
In the Control Panel open the Add/Remove Programs item. On the left side there is an Add/Remove Windows Components icon. Click that and select Internet Information Services (IIS).

Microsoft has a good page of information about how to secure IIS5.
http://www.microsoft.com/technet/security/iis5chk.asp
In IE5, Under Tools, Internet Options, select the Content tab and go to the Certificates section.
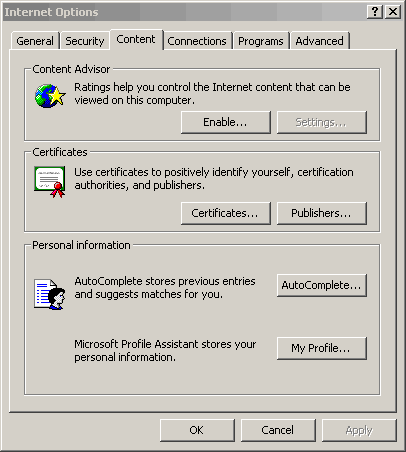
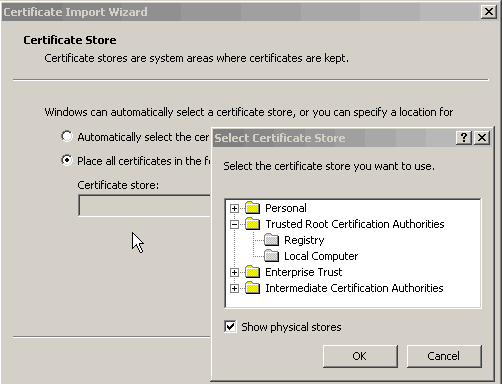
Click the Certificates button. Import the MMC CA certificate (MMCCA.cer). When it asks you to select a store, do it manually. Select browse, and then check Show physical stores. Select Trusted Root Certification Authorities and Local Computer.
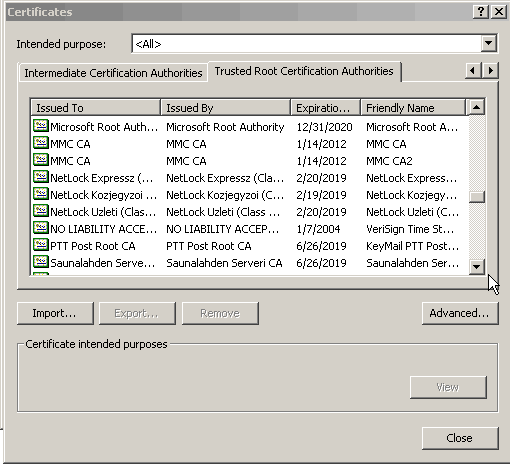
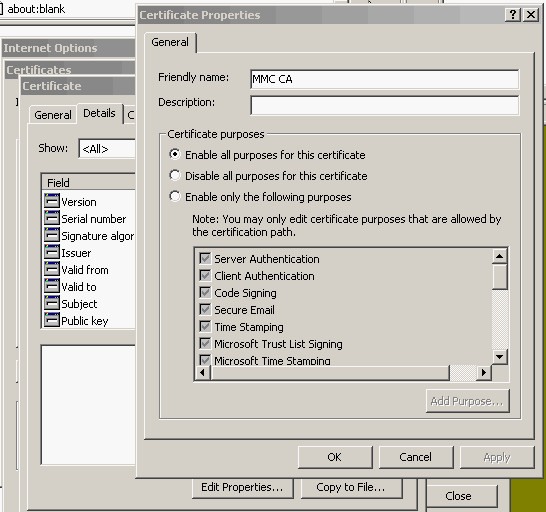
When the import Wizard finishes, view the certificate and be sure that it is trusted for everything in the certificate. You shound see it listed under the Trusted Root Certification Authorities tab.
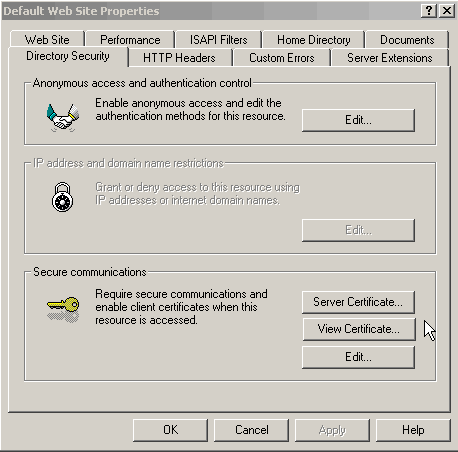
Expand the options under your computer's name, and right-click on the
Default
Web Site and select Properties. Under the Directory Security
tab, click the Server Certificate button.
Go through the Web Server Certificate Wizard to create a server certificate.
For MMC purposes, when it asks for your State, enter Server. You
will have to save the certificate request to a file and open it with a text
editor to cut and paste the request into the MMC CA (https://bant.ms.ornl.gov)
Server Certificate request form.
Once you receive an e-mail that the certificate was issued, you will have to revisit the MMC CA and cut and paste the certificate into a file on your PC with a .crt extension.
Then, revisit the Web Server Certificate Wizard and this time you can install your Server certificate.
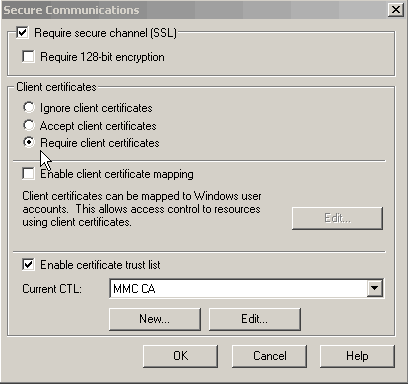
Now go back to the Default Web Site Properties dialog and select the Edit button under the Secure Communications section. On the bottom, check the Enable certificate trust list box, and add the MMC CA certificate via the Certificate Trust List Wizard.
In the Secure Communications dialog, check Require secure channel (SSL) and select the Require client certificates radio button. Restart the server, and it should work.
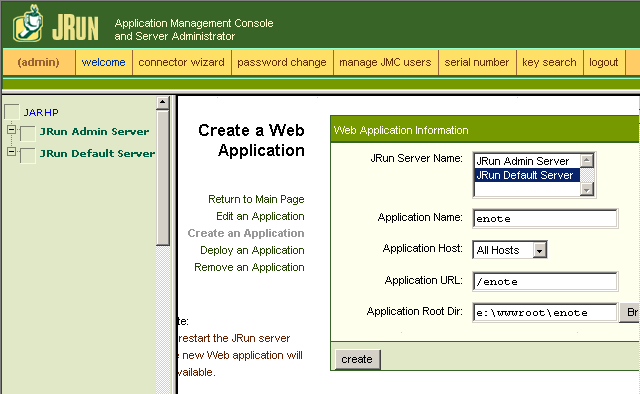
Install it on the Default Server. Here I am installing the electronic
notebook. All URLs starting with https:\\myserver\enote will now be intercepted
by JRun. This will create a directory e:\wwwroot\enote\WEB-INF and several
subdirectories. Your servlet classes (and sources) co in the WEB-INF\classes
directory, and these servlets are accessed by a URL such as
https:\\yourserver\enote\servlet\ServletName
Next, we must specify what URL's should be intercepted, and by what servlet.
Expand the default server tree in the left column and select Servlet URL Mapping.
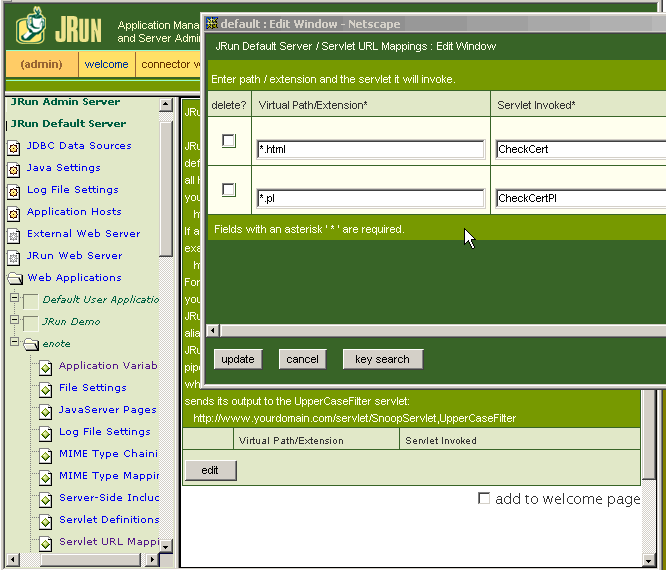
The servlet is in the WEB-INF\classes directory. I.e., all .html requests will be intercepted by the servlet e:\WWWroot\enote\WEB-INF\classes\CheckCert.class.
So, any html or perl URLs under the /enote tree will now be sent to the CheckCert and CheckCertPl servlets. These servlets look at the user's certificate to determine access, and then act on the request. Note that CheckCertPl runs Perl via an exec() and hence the Web Server does not have to have the perl files in an executable directory.
However, your perl flles should be placed under the /enote subtree. In this way, users will not be able to access your perl scripts directly; all such requests are caught by JRun. The notebook files should also probably be placed under the WEB-INF directory because it is protected from direct access by the Servlet engine.
The java files I use to test access are at https://mmc.epm.ornl.gov:444/IISjava.zip (presently unavailable...)